Wind Damage to Roof: How to Inspect, Repair, & Restore
Strong winds can wreak havoc on your roof without you even realizing it. While some damage is obvious—like missing shingles scattered across your yard—other signs are subtle and can lead to costly problems if left unaddressed. Understanding how to identify, assess, and repair wind damage to roof systems is essential for protecting your home and your investment.
This comprehensive guide will walk you through everything you need to know about wind damage to roofs. You’ll learn how to conduct a thorough inspection, understand the repair process, and discover when it’s time to call in the professionals. We’ll also cover:
- How to safely inspect your roof for wind damage
- Step-by-step repair and restoration processes
- When to file an insurance claim
- How to prevent future wind damage
🤔 Understanding Wind Damage to Your Roof

Wind damage occurs when strong gusts compromise your roof’s structural integrity or protective elements. Even moderate winds of 45-55 mph can cause significant damage, while severe storms with winds exceeding 75 mph can devastate unprepared roofing systems.
The most vulnerable areas of your roof include edges, corners, and ridges where wind forces concentrate. These areas experience the highest wind pressures and are often the first to show signs of damage. Your roof’s age, material type, and overall condition also influence its susceptibility to wind damage.
Different roofing materials respond differently to wind forces. Asphalt shingles can lift, crack, or blow off entirely. Metal roofing may develop loose fasteners or panels. Tile roofs can experience cracked or displaced tiles, while flat roofs might develop membrane tears or lifted sections.
Common Types of Wind Damage
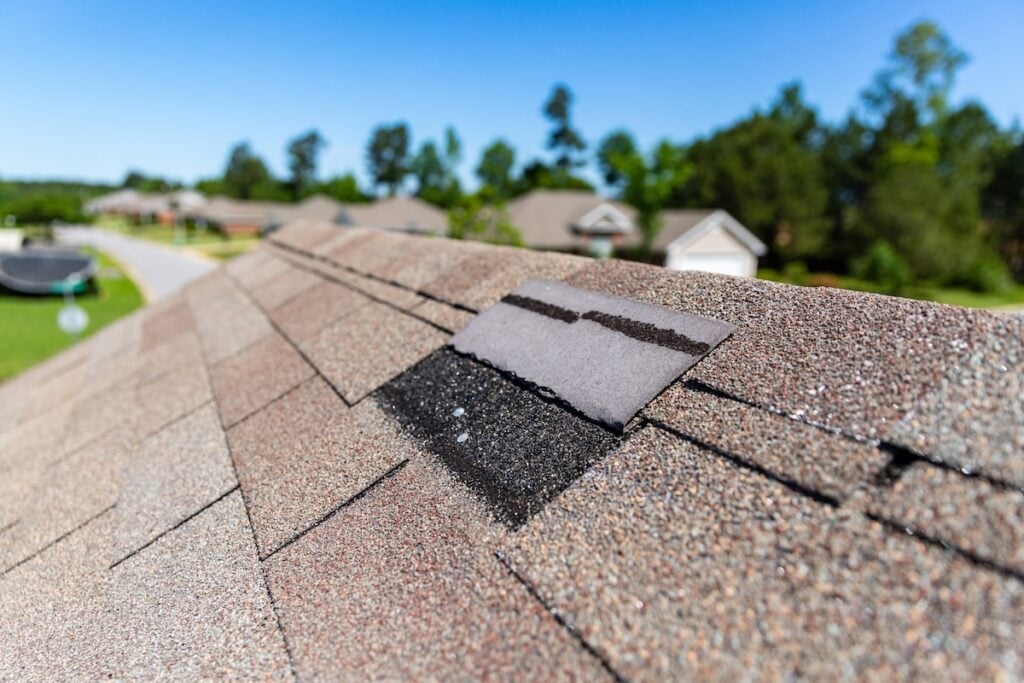
- Missing or Damaged Shingles: High winds can lift or tear shingles, leaving your roof exposed. Look for missing, cracked, curled, or lifted shingles, as well as exposed nail heads, which can lead to leaks.
- Granule Loss: Excessive loss of protective granules on asphalt shingles weakens their UV and weather resistance. Check for bare spots or granules accumulating in gutters, which may indicate wind damage.
- Flashing Damage: Flashing around chimneys, vents, skylights, and roof valleys can become bent, cracked, or dislodged by wind, creating water entry points and increasing the risk of leaks.
- Gutters and Downspouts: Strong winds can pull gutters and downspouts away from the roofline or cause cracks and dents, preventing proper water drainage and risking foundation or landscaping issues.
🔎 7 Steps to Inspect Wind Damage to Your Roof

Conducting a thorough roof inspection after windstorms helps you identify damage early and prevent minor issues from becoming major problems. Here’s how to safely and effectively inspect your roof:
1. Start with a Ground-Level Visual Assessment
Begin your inspection from the ground using binoculars to examine your roof safely. Look for obvious signs of damage like missing shingles, exposed underlayment, or debris on the roof. Check for symmetry—if one side of your roof looks different from the other, damage may be present.
Walk around your entire home to view the roof from multiple angles. Pay special attention to areas where different roof planes meet, as these locations experience higher wind pressures.
2. Examine Your Gutters and Yard
Check gutters for an unusual accumulation of shingle granules, which indicates potential shingle damage. Look for pieces of roofing material, nails, or other debris in your yard and gutters.
Inspect downspouts for dents or disconnections. Document any roofing materials you find with photos, noting their location and condition.
3. Inspect Your Home’s Interior
Check your attic for signs of water intrusion, including wet insulation, water stains, or daylight visible through the roof deck. Use a flashlight to examine the underside of the roof decking for dark spots, which may indicate leaks.
Look for water stains on ceilings and walls throughout your home. Even small stains can indicate significant roof damage that requires immediate attention.
4. Check Flashing and Roof Penetrations
Examine flashing around chimneys, vents, skylights, and where the roof meets walls. Look for gaps, cracks, or sections that appear loose or displaced. These areas are particularly vulnerable to wind damage and water infiltration.
5. Assess Gutters and Drainage Systems
Inspect gutters for proper attachment to the roofline. Look for sagging sections, loose brackets, or gutters pulling away from the house. Check that downspouts are securely connected and directing water away from your foundation.
6. Document Everything
Take clear photos of any damage you discover, including wide shots showing the overall area and close-ups of specific problems. Include reference points like nearby landmarks to help contractors and insurance adjusters locate the damage.
Create a written inventory of damage with descriptions, locations, and estimated sizes. This documentation proves invaluable for insurance claims and contractor communications.
7. Safety First: When to Call Professionals
Never climb onto your roof, especially after a storm. Wet or damaged roofing materials create serious fall hazards. If you suspect significant damage or can’t complete a thorough ground-level inspection, contact professional roofers immediately.
Professional inspectors have the training, equipment, and experience to safely assess your roof and identify problems you might miss.
🛠️ Repair and Restoration Process
The repair and restoration process is crucial for preserving the functionality and longevity of damaged items. It ensures resources are efficiently used while maintaining structural integrity and value.
Emergency Repairs
If you discover active leaks or severe damage, take immediate action to prevent further harm to your home. Place buckets under leaks and move valuable items away from affected areas. For emergency roof repairs, contact professional contractors who offer 24/7 storm response services.
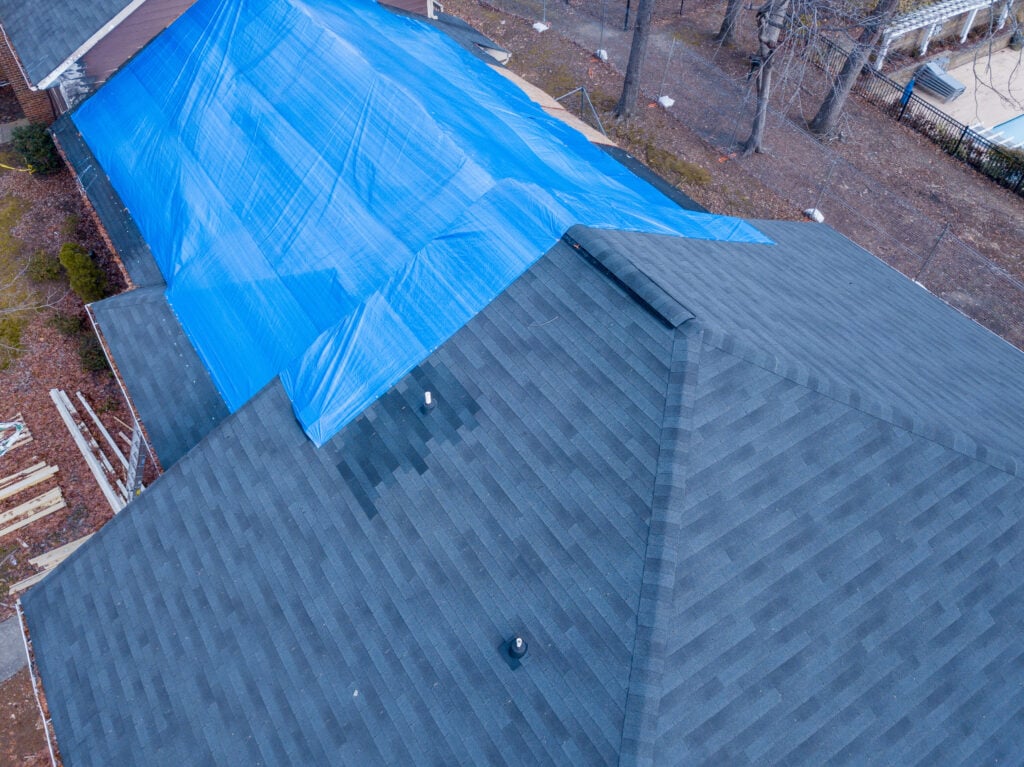
Temporary measures like tarps can provide short-term protection, but these should only be installed by experienced professionals due to safety concerns and the risk of improper installation causing additional damage.
Professional Assessment
A qualified roofing contractor will conduct a comprehensive inspection to assess the full extent of damage. They’ll examine not just the visible problems but also underlying issues that might not be immediately apparent.
Professional assessments include evaluating the roof deck, underlayment, and structural components. Contractors can also determine whether repairs are sufficient or if partial or complete roof replacement is necessary.
Insurance Claims Process
Contact your insurance company as soon as you discover wind damage. Most policies require prompt notification of damage, and delays can complicate the claims process. Your insurance adjuster will inspect the damage and determine coverage based on your policy terms.
Work with contractors experienced in insurance claims to ensure all damage is properly documented and included in repair estimates. This collaboration helps maximize your coverage and ensures quality repairs.
Choosing Quality Materials
When repairing wind damage, consider upgrading to materials with better wind resistance ratings. Impact-resistant shingles, enhanced fastening systems, and improved underlayment can provide better protection against future storms.
Your contractor can recommend materials appropriate for your local climate and building codes while staying within your budget and insurance coverage.
👉 Preventing Future Wind Damage

Preventing future wind damage is crucial to protecting homes, infrastructure, and communities from costly repairs and safety risks. Proactive measures can save lives and minimize the impact of severe weather events.
Regular Maintenance
Consistent roof maintenance significantly reduces wind damage susceptibility. Schedule annual professional inspections and address minor issues before they become major problems. Keep gutters clean and ensure proper drainage to prevent ice dams and water backup.
Trim overhanging tree branches that could fall on your roof during storms. Remove debris like leaves and branches that can trap moisture and cause deterioration.
Structural Improvements
Consider upgrading your roof’s wind resistance through structural improvements. Enhanced fastening systems, hurricane straps, and impact-resistant materials can dramatically improve your roof’s storm survival chances.
Modern building codes often require these improvements during major renovations, but voluntary upgrades can provide peace of mind and potential insurance discounts.
Quality Installation Matters
Proper installation is crucial for wind resistance. Even the best materials fail if not installed correctly. Choose contractors with proven experience, proper licensing, and manufacturer certifications.
Quality installation includes proper fastener spacing, adequate sealing, and attention to details like flashing and edge protection. These elements work together to create a unified defense against wind forces.
👨🔧 Why Professional Expertise Makes the Difference
When it comes to protecting your home from wind damage, choosing the right roofing team is essential. At Armour Construction, we bring years of experience, deep knowledge of Midwest weather challenges, and a commitment to honest, reliable service. Our certified professionals specialize in identifying even the smallest signs of wind damage and providing cost-effective solutions to keep your home safe and secure. We work directly with insurance companies to make the claims process hassle-free, ensuring you get the coverage you deserve. As a family-owned business, we pride ourselves on delivering high-quality work with a personal touch, building trust and long-lasting relationships in our community.
Don’t leave your home’s protection to chance. If you suspect wind damage or want to improve your roof’s durability, contact Armour Construction today for a free, comprehensive inspection. Let us help you shield your home with the care, expertise, and dedication you can trust.


