DIY Roof Patch Tips (6 Ways to Stop Leaks Fast)
When a sudden leak appears, knowing how to apply a quick roof patch can save your home from further water damage until a professional can make permanent repairs. Even small leaks can lead to costly problems like mold growth, insulation damage, and rotting wood if left untreated. By understanding how to identify the source of a leak and apply a reliable temporary fix, homeowners can minimize damage and protect their property from larger repairs later.
Here’s what this guide covers:
- How to spot early signs of roof leaks before they spread
- Simple DIY patching methods for minor leaks
- Tools and materials every homeowner should keep on hand
- When to call a roofing professional for long-term solutions
Why Roof Leaks Need Immediate Attention

A leaky roof is more than an inconvenience—it’s a serious threat to your home’s structure. Water intrusion can travel far from the source of the leak, seeping into walls, ceilings, and electrical systems. Even a small drip can quickly escalate into major damage if ignored. An average roof lasts between 20 and 50 years depending on material quality, making timely inspections and repairs essential to avoid premature failure.
In South Bend, IN, where heavy rain and snowmelt are common, leaks often start around flashing, vents, and seams. Taking swift action with the right materials helps stop moisture before it seeps into insulation or framing.
6 DIY Roof Patch Tips for Quick Leak Prevention
When water starts dripping, every minute counts. The following six DIY tips will help you patch minor leaks safely and effectively until a professional repair can be completed.
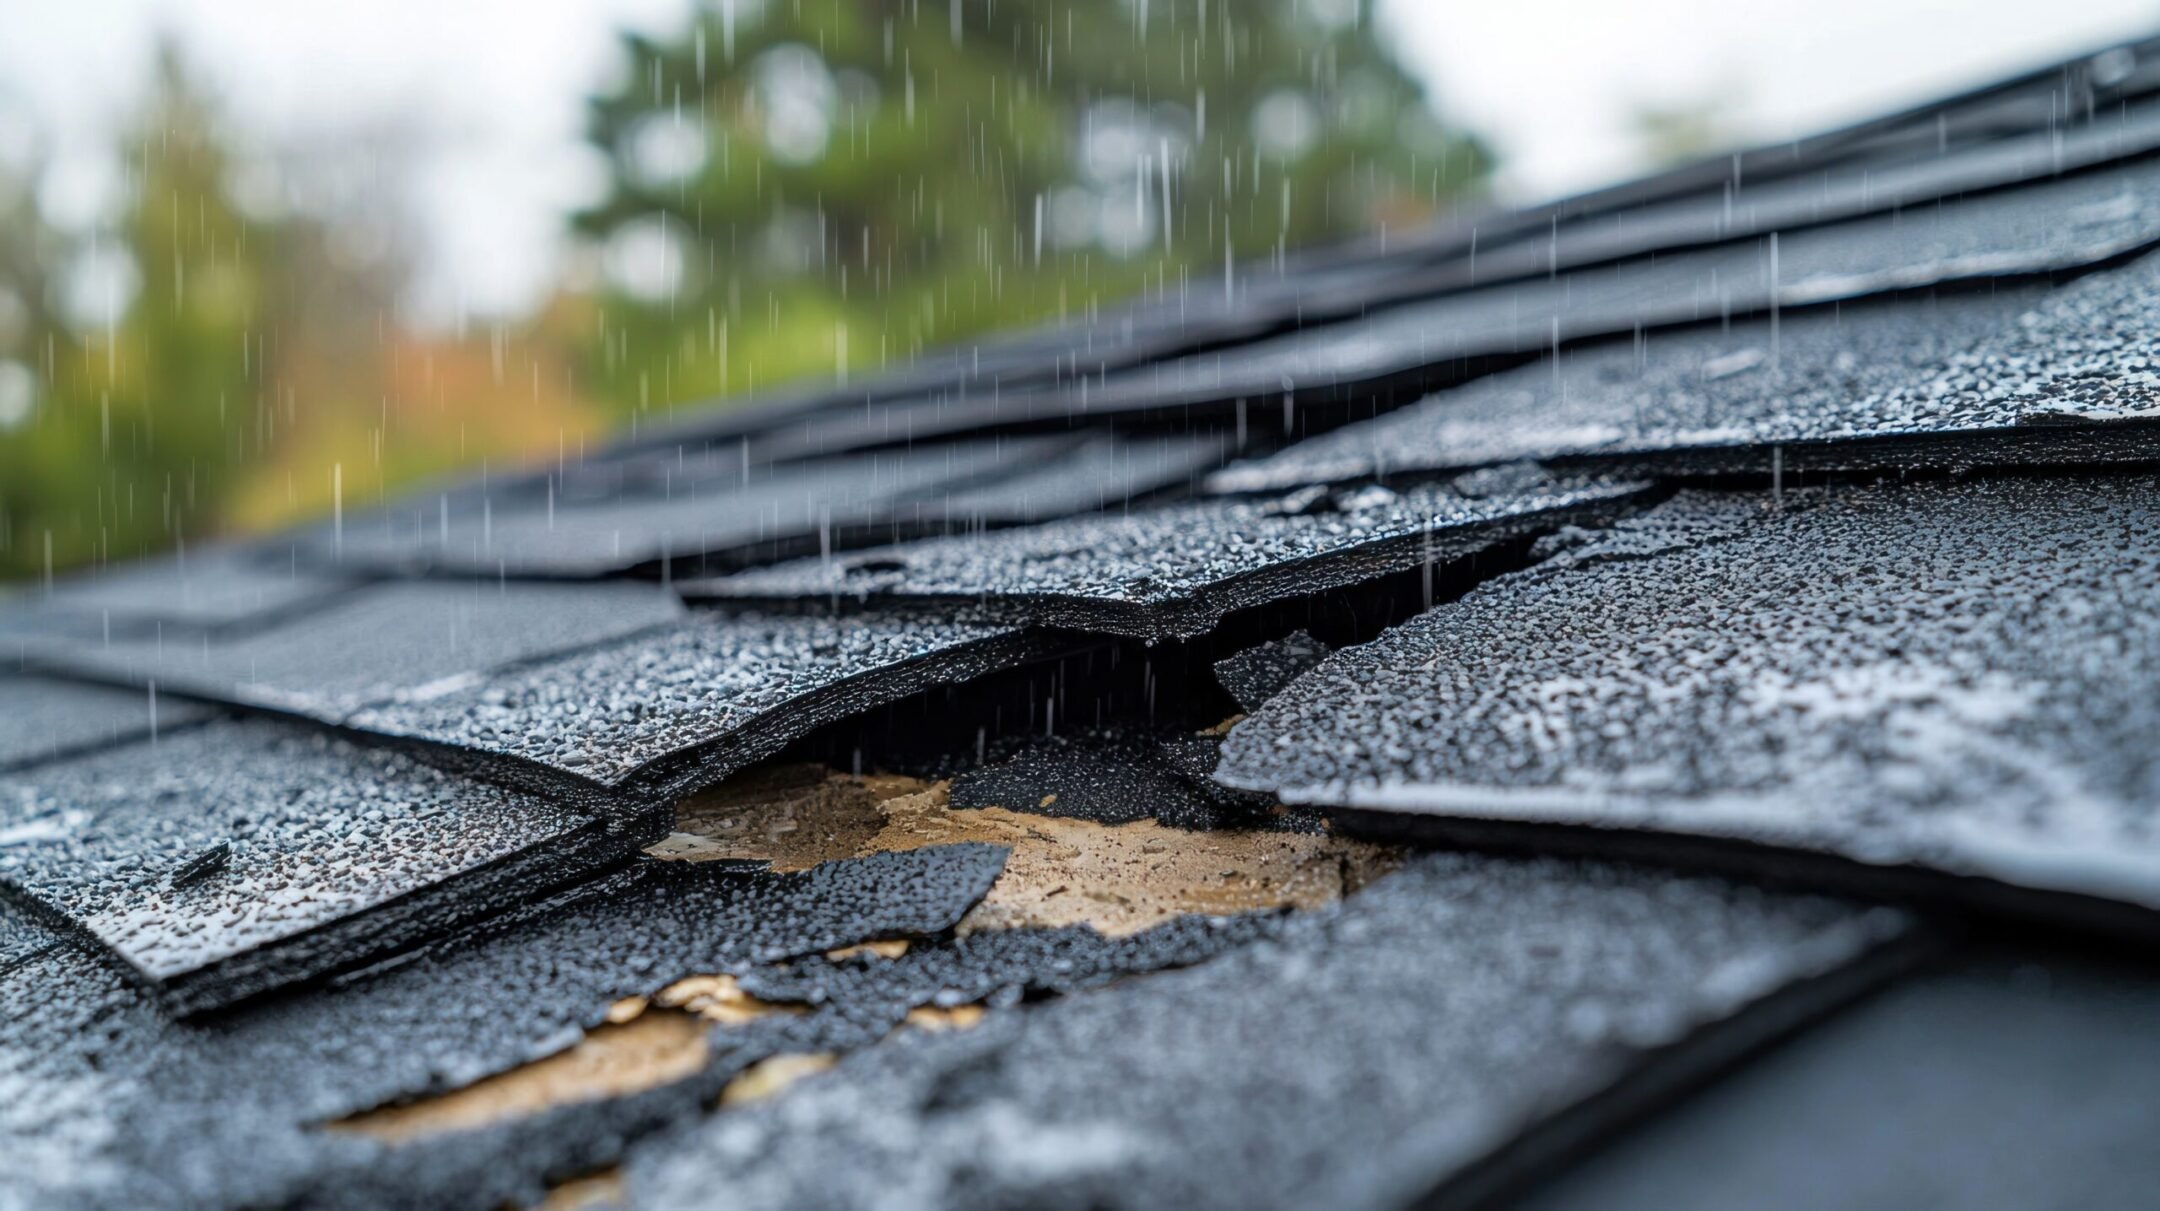
1. Locate the Exact Source of the Leak
Finding where the water is entering your home is the first and most important step. Leaks often appear several feet away from where the water actually penetrates.
- Interior signs: Look for water stains, bubbling paint, or sagging drywall.
- Exterior inspection: Check shingles, flashing, and roof vents for cracks or gaps.
- Tip: Use a flashlight in the attic during daylight hours to see where sunlight peeks through the decking.
2. Clear the Area Around the Leak
A clean, smooth surface ensures your patch adheres properly. Remove any debris, loose asphalt, or old caulk before applying new materials.
- Safety first: Always wear rubber-soled shoes and work on dry surfaces to prevent slipping.
- Debris removal: Sweep away dirt, leaves, and granules from the repair area.
- Dry thoroughly: Moisture under a patch can cause bubbling or peeling later.
3. Use Roofing Cement for Small Cracks and Holes
Roofing cement is one of the most effective products for a quick DIY roof patch. It works well on asphalt shingles, pvc, and EPDM roofing membranes.
- Application: Use a trowel to spread roofing cement evenly over and slightly beyond the damaged spot for excellent adhesion.
- Reinforcement: For larger cracks, press a piece of roofing mesh into the cement before applying a second layer.
- Curing: Allow it to dry completely before exposing it to heavy rain or snow.
4. Apply Roof Patch Tape for Emergency Repairs
Roof patch tape offers an instant fix that’s ideal for flat or metal roofs. It provides a waterproof seal and can hold for weeks until permanent repairs or replacement are made.
- Surface prep: Wipe the area clean and dry before the product is applied.
- Pressure application: Use a roller to remove air bubbles and ensure excellent adhesion.
- Durability: While temporary, a good-quality patch tape can resist rain and UV rays for several months.
5. Replace or Reseal Damaged Flashing
Flashing around chimneys, vents, and skylights is a common source of leaks. Damaged flashing should be resealed or replaced to prevent further water intrusion.
- Inspection: Look for rust, cracks, or lifted edges along the metal membrane.
- Resealing: Apply a thick bead of roofing sealant along the seams and press down firmly.
- Replacement: If flashing is loose or severely corroded, replace the section and secure it with roofing nails.
6. Keep Roof Patch Materials Handy for Emergencies
Having supplies ready can make all the difference during a sudden storm or overnight leak. Prepare a small kit so you can act fast when needed.
- Essentials: Roofing cement, patch tape, utility knife, gloves, and spare shingles.
- Storage: Keep materials in a dry, accessible area such as a garage or shed.
- Readiness: Regularly check your supplies and replace expired sealants or adhesives.

Comparing Roof Patch Materials
Choosing the right patching material depends on your roof type and the severity of the leak. The table below compares some of the most common materials homeowners use for temporary fixes.
| Material | Best For | Longevity | Difficulty | Cost Range |
| Roofing Cement | Asphalt or pvc roofs | 1–2 months | Easy | Low |
| Roof Patch Tape | Metal or flat roofs | 2–6 months | Easy | Low–Medium |
| Silicone Sealant | Flashing and vents | 3–6 months | Moderate | Medium |
| EPDM Repair Kit | Rubber membrane roofs | 6–12 months | Moderate | High |
When to Call a Professional Roofer
A DIY roof patch is a smart short-term fix, but it’s not a permanent solution. If you notice ongoing leaks, sagging areas, or multiple damaged shingles, contact a roofing professional right away. A licensed contractor can perform a full inspection, identify hidden damage, and recommend whether repair or full replacement is needed.
A professional installation ensures that every product, from adhesives to membranes, is applied properly and built to last through all weather conditions.
Preventing Future Leaks
Keeping your roof in good condition year-round reduces the likelihood of needing emergency patches. Regular inspections and maintenance are the best defense against recurring leaks.
- Seasonal checks: Schedule a professional inspection every spring and fall.
- Gutter care: Clean gutters regularly to prevent water pooling near roof edges.
- Tree trimming: Cut back overhanging branches that can scrape or puncture shingles during storms.
- Prompt repairs: Fix loose shingles or minor cracks before they spread.
Protect Your Home With Armour Construction

Leaks can start small but cause big problems if left unaddressed. A fast, well-applied roof patch can buy valuable time, but professional attention ensures long-term safety. Armour Construction’s experienced roofing team provides expert leak detection, repair, and roof replacement services in South Bend, IN, and surrounding areas. We’re proud to serve home and business owners in South Bend, IN, and nearby communities with roof repair, inspections, and emergency patching services designed for lasting protection.
If you’re dealing with leaks or need professional help after a DIY fix, contact Armour Construction today to schedule a roof inspection and get expert solutions that restore your home’s safety and strength.