Ice Dam Prevention: 7 Ways to Protect Your Roof
When snow melts on one part of a roof and refreezes on another, the result is a wall of ice that can force water straight into your home. Many homeowners only learn about it after a stained ceiling appears. Effective ice dam prevention is about controlling heat, airflow, and drainage before winter arrives, and it starts with taking a closer look at the layers that keep your roof dry from the shingles down to the attic floor.
In this guide, you will learn:
- How ice dams form and why they cause so much damage
- Seven ways to stop them before they start
- A season by season checklist to keep your roof ready
- Warning signs that an ice dam may be developing
- When to call a professional for help
What Causes Ice Dams And Why They Matter

Ice dams start inside your house. Warm air leaks into the attic, heats the underside of the roof deck, and melts the snow resting on top. That water runs down to the eaves, where the roof is colder, and freezes into a ridge. As more meltwater arrives, it pools behind the ridge and seeps under the shingles.
Homeowners in Hebron and surrounding areas see plenty of freeze and thaw cycles each winter, which creates the perfect conditions for this process. The damage tends to build quietly. A small leak in January can soak insulation, spread along framing, and only become visible weeks later, by which point the repair is usually larger and more expensive than the prevention would have been. Understanding what is at stake makes it easier to justify prevention:
- Interior Water Damage: Meltwater that gets past the shingles can stain ceilings, ruin drywall, and soak insulation.
- Mold Risk: Persistent moisture in the attic creates conditions where mold and mildew can take hold.
- Roof Deterioration: Repeated freezing and thawing lifts shingles and loosens flashing over time.
- Gutter And Fascia Damage: The weight of heavy ice can bend gutters and pull them away from the house.
7 Ways To Stop Ice Dams Before They Start
The most reliable approach combines several small improvements rather than relying on a single fix. Each of the steps below targets a different part of the problem, from stopping heat loss to preparing the roof edge for worst case weather.
1. Air Seal The Attic Floor First
Before adding insulation, close the gaps that let heated air rise into the attic. Even small openings around light fixtures, chimney chases, and plumbing penetrations can leak a surprising amount of warm air. Sealing them is often the most cost effective step on the list.
- Seal around recessed lights, wiring holes, and plumbing stacks
- Weatherstrip the attic hatch or pull-down stairs
- Use fire rated materials around chimneys and flues
2. Bring Insulation Up To Modern Levels
Once air leaks are sealed, insulation keeps the remaining heat where it belongs. Older homes often have thin or settled insulation that no longer performs well. Guidance for colder regions commonly recommends around R-49 or higher in the attic, though your ideal level depends on your home.
- Spread insulation evenly across the attic floor
- Extend it close to the eaves without blocking airflow
- Replace insulation that has been compressed or soaked
3. Balance Soffit And Ridge Ventilation
A properly ventilated attic stays near the outdoor temperature, which keeps the roof deck cold and prevents uneven melting. Air enters through soffit vents, rises through the attic, and exits through ridge or gable vents, carrying heat and moisture with it.
- Keep soffit vents clear of insulation and debris
- Use baffles to maintain an air channel along the roof deck
- Make sure intake and exhaust vent area are well matched
4. Add A Waterproof Membrane At The Eaves
Self-adhering ice and water membrane serves as a backup layer along the lowest part of the roof. If water does back up behind an ice dam, the membrane seals around fasteners and helps prevent leaks from reaching the decking.
- Typically installed along the eaves and in valleys
- Most practical during a roof replacement
- Complements, but never replaces, good insulation and ventilation
5. Keep Gutters Flowing
Gutters packed with leaves and debris trap water that freezes and builds up into thick ice. Clearing them before winter gives meltwater a path off the roof and reduces strain on the gutter system.
- Clean gutters and downspouts in late fall
- Make sure downspouts direct water well away from the foundation
- Repair loose or sagging sections before the first freeze
6. Manage Snow Load Safely

Removing snow near the roof edge reduces the amount of meltwater available to refreeze. A roof rake with a long handle allows you to clear the lowest several feet from the ground, which is where ice dams most often begin.
- Rake gently to avoid damaging shingles
- Never climb onto an icy roof
- Keep away from power lines and areas where snow may slide
7. Schedule A Fall Roof Inspection
A trained eye can spot small problems that lead to big ones, such as missing insulation, blocked vents, lifted shingles, or failing flashing. Catching these issues in autumn gives you time to fix them before temperatures drop.
- Ask for an attic check as well as a roof surface review, since many causes hide below the shingles
- Address minor repairs before snow arrives
- Use the inspection to plan for upgrades like added ventilation
A Season By Season Ice Dam Prevention Checklist
Staying ahead of ice dams is easier when you break the work into manageable pieces. Homeowners in Hebron and surrounding areas can use this simple calendar to keep their roofs ready year after year.
Fall Preparation
Autumn is the best time to handle anything that requires access to the attic or roof. Clean the gutters, inspect insulation and vents, and schedule any repairs while the weather is still mild. Working before the first freeze also means contractors have more flexibility, and you avoid trying to fix problems in icy conditions.
Winter Monitoring
During the cold months, watch for early signs of trouble after each major snowfall. Clear snow from the roof edge when it is safe to do so, and check the attic occasionally for frost, moisture, or unusual cold spots.
Spring Follow Up
Once the thaw arrives, walk the property and look for damage. Check the gutters, shingles, and ceilings for stains or wear, and address anything that appeared over winter before it grows into a larger repair. Spring is also a good moment to note which areas of the roof held ice longest, since those spots often point to heat loss underneath.
Warning Signs An Ice Dam Is Forming
Spotting trouble early can save you from a major repair, and many of the clues are visible without ever leaving the ground. Homeowners in Hebron and surrounding areas should watch for the following signs, whether from the yard or inside the house.
| Warning Sign | Where To Look | What It May Mean |
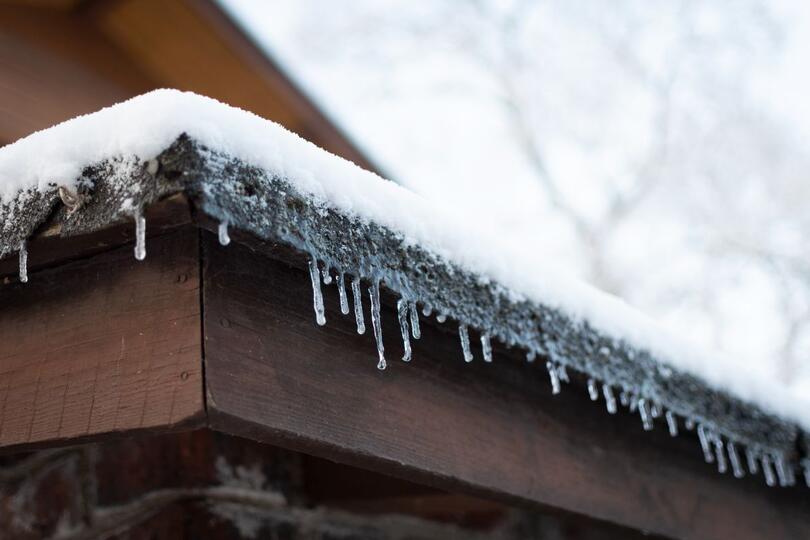
| Large icicles along the eaves | Roof edge and gutters | Meltwater is refreezing at the roofline |
| Ice ridge along the lowest shingles | Eaves | An ice dam has formed and may be blocking drainage |
| Ceiling or wall stains | Interior rooms near exterior walls | Water has already entered the home |
| Frost on the attic roof deck | Attic | Warm moist air is leaking into the attic |
| Peeling paint near the roofline | Soffits and exterior trim | Moisture is backing up and escaping outside |
What To Do When You Notice A Problem

- Limit The Source: Clear loose snow above the ice with a roof rake from the ground.
- Protect Belongings: Move items away from stained or dripping areas inside.
- Avoid Chopping Ice: Tools can tear shingles and flashing and make matters worse.
- Call A Professional: An inspection can identify the underlying cause and recommend lasting repairs.
Keep Your Roof Ready For Winter
Ice dams are a common winter headache, but they are far from inevitable. With careful air sealing, strong insulation, balanced ventilation, and a dependable layer of protection at the eaves, most homes can avoid the damage that comes from trapped meltwater. Taking action in the fall costs far less than repairing soaked insulation, stained ceilings, and rotted decking in the spring.
Armour Construction has helped homeowners across Hebron and surrounding areas get their roofs ready for harsh winters, from improving attic airflow to protecting the roof edge. Our team looks at the whole roofing system, so the fix addresses the cause rather than just the symptom. If you have seen ice buildup, ceiling stains, or recurring icicles, contact us today and let the Armour Construction team help you stay a step ahead of the next freeze.